Search

cookingwithlauren

Tag

easy

A side dish and dessert

I’m pretty experienced in the realm of making entrĂ©es and huge desserts that can feed about 10 people, but for this blog I wanted to show off how I cook for 1. My last post was about french dip sandwiches that I made for dinner, and I thought I’d share a small side dish and a quick dessert to go along with it.

For the side, I decided to make some garlic-parmesan asparagus, which is one of my all time favorites, and it’s super simple. Here’s what you’ll need:

  1. Asparagus (however much you think you’ll eat)
  2. Olive oil
  3. Garlic powder/ Minced garlic
  4. Salt
  5. Pepper
  6. Grated parmesan cheese

The only steps are to take the asparagus and snap off the bottom parts. Just bend the sprigs gently until they snap in a natural spot, and you can do a handful at a time. Then, lay them out on a flat baking sheet.

Cover the asparagus in olive oil and make sure to roll it around so that every part gets coated. Then, sprinkle on some minced garlic or garlic powder. Something that came in really handy for this was I actually had garlic-infused olive oil, and I highly recommend it. It’s two steps in one!

Then, sprinkle on the salt and pepper all over, and sprinkle the parmesan onto the tops of the asparagus, where the leafy bits are. After that, the only thing left to do is throw them in the oven at 450 degrees for about 7 minutes.

This goes great with chicken or beef dinners, and its always my go-to when I feel like my dinner needs a little something extra.

Now, let’s move onto the dessert. When I bake, I usually make huge batches of desserts that I can never eat all of, because I am only one person. Today, though, I found a recipe that’s perfect for one person and will be just as good to save for later: Braided Nutella bread.

This is a recipe that only takes two ingredients:

  1. Nutella
  2. Crescent rolls

First thing’s first, grab a baking sheet and lay out the entire package of crescent rolls, flat. You’ll have to seal off all of the pre-made perforations, because we don’t want this splitting apart when we try to braid it.

The next step is to pretty much cover the entire thing with Nutella. If needed, put the Nutella in the microwave for about 10-15 seconds to make it a little easier to spread.

After that, simply roll it up long ways so that it looks like it did coming out of the package.

Once it’s rolled up, make a cut down the middle of the roll, again long ways, splitting the bread in half so that it can be braided.

To do the braiding, you’re supposed to fold one end over the other and keep that up until you reach the bottom. I’ll be honest, though, I just twisted the bread around itself in a spiral. After that, put it in the over at 375 degrees for about 17-20 minutes.

IMG_2962

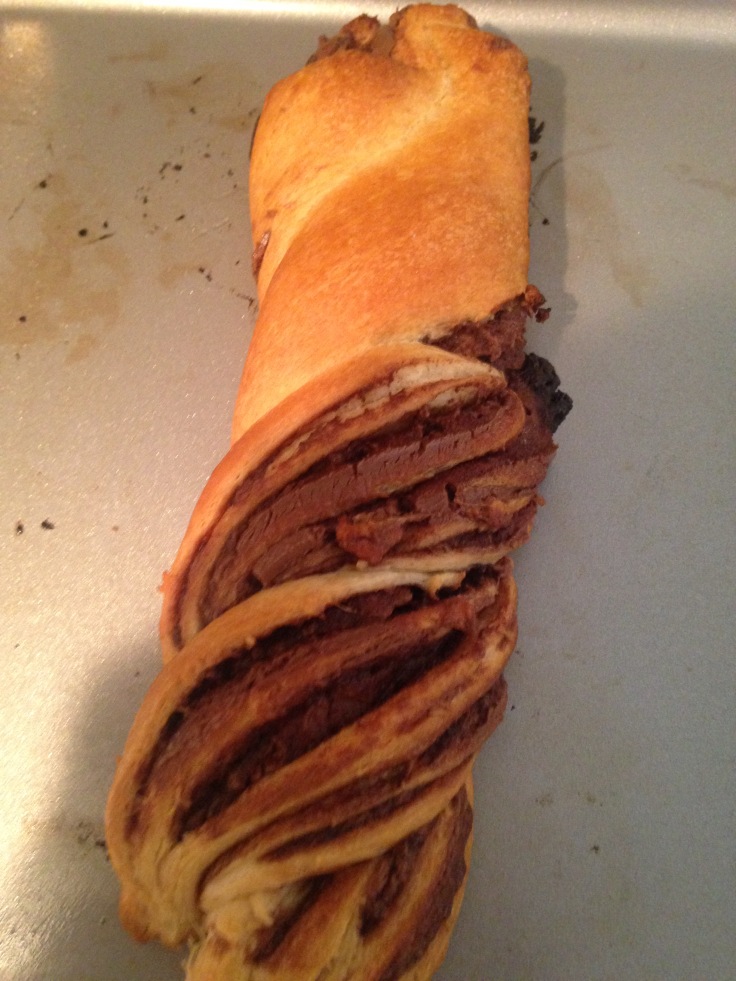
It looks pretty good once it’s done, right? It tastes even better. I ate almost a whole role after dinner last night. To finish off, feel free to add some powdered sugar on top for an extra flair.

I hope this gave everyone some ideas on what to do when you only have the main dish prepped, but want to make a meal look a little bit more put-together. Let me know some of your favorite quick and easy side dishes!


Crock pot adventures: French dip sandwiches

In my opinion, the best tool for people like me who are absolutely inept at cooking is a crock pot.

It’s just wonderful, you throw things into a bowl and you just leave it until you’re ready to eat. It’s the best. However, I’ve been pretty bland with how I use my crock pot, and I pretty much stick to only making pulled beef or pork sandwiches. They’re delicious and great, but I thought it was time to change pace a little bit.

I looked through a few recipes for french dip sandwiches and, to be honest, it was pretty hard to find one that didn’t include beer of some sort (and I can’t exactly walk up to a counter with a six pack and say I need it to make sandwiches), but eventually I found one that was super simple and really delicious, with no alcohol required.

Here’s what you’ll need for this:

  1. About a 4 lbs. rump roast
  2. 1 16oz can french onion soup
  3. 1 16oz can beef consomme
  4. Provolone cheese
  5. Hoagies

That’s it! So let’s get started on prep work for this before you throw it into the crock pot. You’ll want to cut off any extra fat before it goes into the cooker, because rump roasts have a ton of extra fat that will be too chewy in a sandwich. After that, just take the rump roast, heat up some vegetable oil in a pan and sear all around the outside of the beef.

Then, just throw it into the crock pot with both of the soups, and leave it either on high heat for about 4 hours or on low heat for 8. I started this at about 11 a.m. this morning, so it was perfect when I pulled it out at 7 p.m. for dinner.

When it comes time to take the beef out of the cooker, there are a few options you can go with. One is to treat it like pulled beef and simply shred it with a couple of forks, which would work fine.

The option that I went for was actually to cut the beef into long, thin slices. I wanted to switch it up a bit from my usual pulled beef texture, and this roast was a little hard to just pull apart with a fork.

IMG_2966

Once I had the beef all sliced up, I put it back in the crock pot for about 30 minutes to soak up some more juice while I prepped a side dish, which you can find out how to make in my next blog post.

The very last thing you want to do is put a few slices of provolone onto a hoagie bun and heat it up in the microwave for about 20 seconds so that the cheese melts. Then, you can lay some beef onto the sandwich and it’s good to go! Except for one more thing…

To make the “au jus” (it’s just soup) to dip the sandwich in, just get a little juice out of the crock pot and put it into a smaller bowl, making sure not to get any pieces of fat or anything in the dish. As a pro tip for other college students who don’t have a mini decorative bowl lying around, use a Tupperware dish!

IMG_2971

It doesn’t look as gooey and melty as some of the french dip sandwiches that I’ve seen online, but that’s ok because who really wants a big mess to clean up? Anyway, I hope you guys enjoy trying to make this on your own. Come back later today to see how I made the asparagus AND an extra-special dessert recipe!

Blog at WordPress.com.

Up ↑